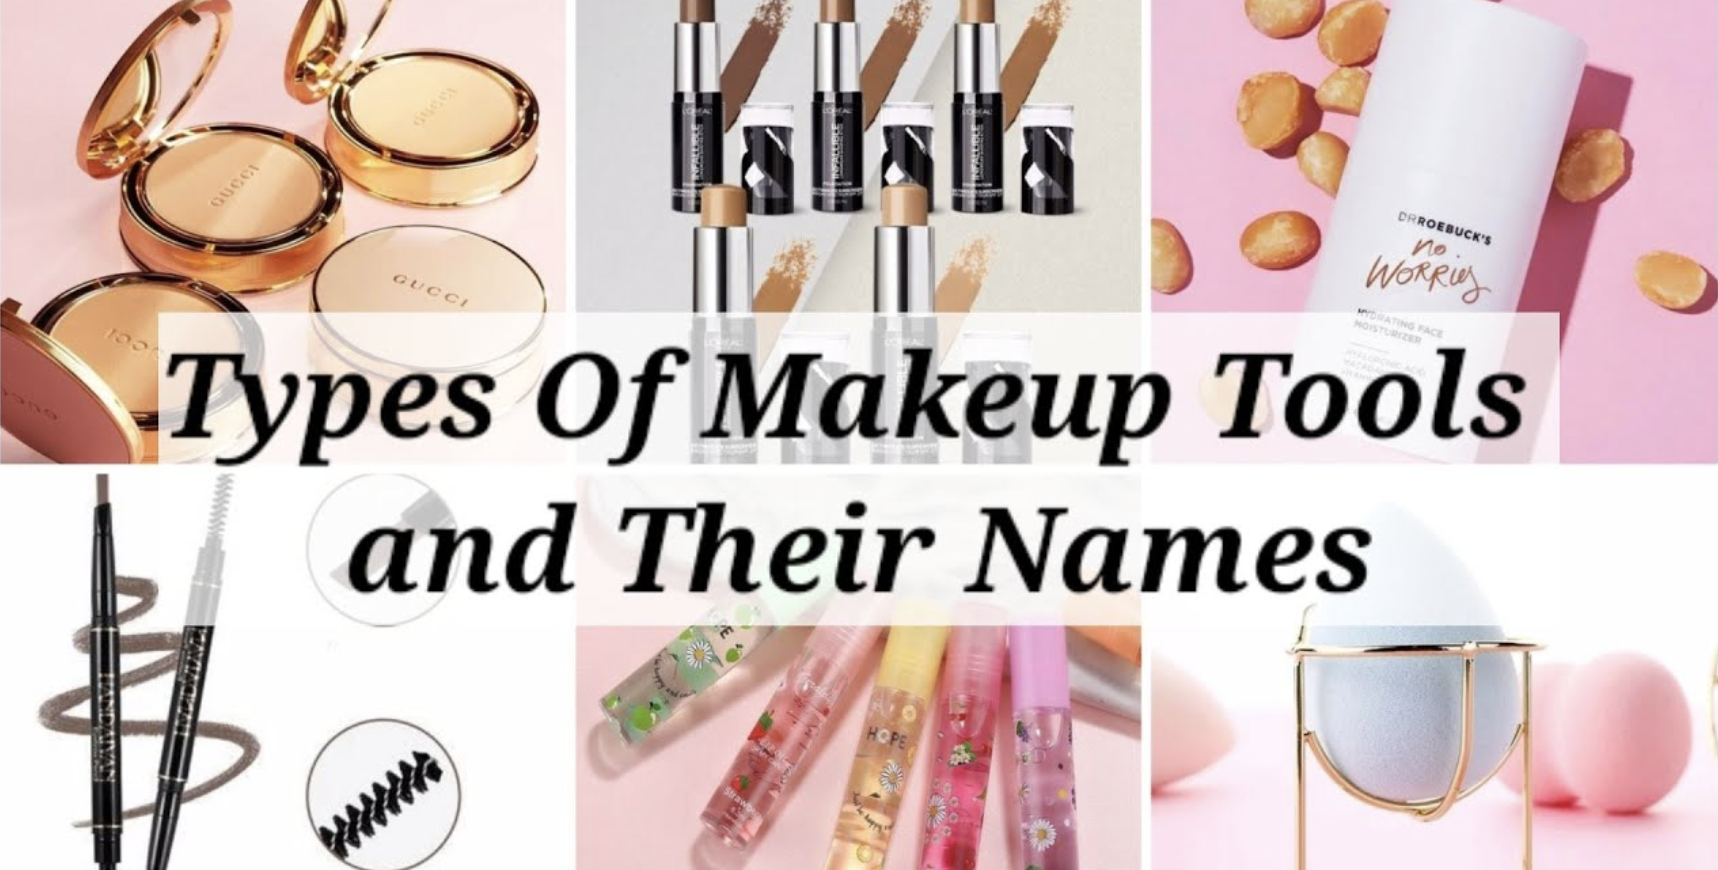
25 Essential Makeup Tools Names and Their Uses
Ever wondered why your makeup doesn’t look quite like the tutorials? Here’s the secret: it’s not just the products you use—it’s the tools that make the magic happen.
Makeup tools are the backbone of any flawless look, from a simple everyday face to full-on glam. If you’ve ever felt overwhelmed walking down the beauty aisle or scrolling through endless online options, you’re not alone.
This guide is your one-stop breakdown of 25 essential makeup tools names and their uses.
Whether you’re a beginner or a beauty enthusiast, you’ll find exactly what you need to take your makeup game from average to amazing.
You’ll learn:
- What each tool is for
- When to use it
- Pro tips on buying and maintaining them
- A full comparison table for quick reference
Read this review before you buy—you’ll save time, money, and avoid the frustration of using the wrong tools.
Let’s dive in.
Table of Contents
The Foundation of Beauty: Base Makeup Tools

The first step to achieving flawless makeup is nailing your base. These tools help apply foundation, concealer, and powders evenly, ensuring your makeup lasts longer and looks smoother.
1. Foundation Brush
A foundation brush is a must-have for anyone who wants an even, airbrushed finish. It’s typically flat or dome-shaped, allowing you to spread liquid or cream foundation effortlessly across your face.
Use:
- Ideal for liquid or cream foundations
- Blends product without absorbing too much
- Offers full coverage with precise application
Pro Tip: Choose synthetic bristles for cream formulas—they’re easier to clean and don’t soak up as much product.
Best For: Normal to oily skin types that want full, polished coverage without streaks.
2. Beauty Blender / Makeup Sponge
Ah, the beauty blender—every makeup artist’s favorite tool. This egg-shaped sponge helps you blend foundation, concealer, and even cream blushes seamlessly into the skin.
Use:
- Best for light to medium coverage
- Ideal for creating a dewy, natural finish
- Works best dampened
Pro Tip: Tap (don’t drag!) the sponge across your face to build product without caking it. The pointed tip reaches under eyes and around the nose, while the rounded end covers larger areas.
Best For: All skin types, especially dry or mature skin looking for a hydrating finish.
3. Concealer Brush
If you want that spot-on precision for covering blemishes or brightening under your eyes, a concealer brush is your go-to tool. It’s usually small, flat, and slightly tapered.
Use:
- Blends concealer into targeted areas
- Great for correcting dark circles, redness, and imperfections
- Can also double as a lip brush in a pinch
Pro Tip: Use short, dabbing motions for maximum coverage. For under-eye areas, use a light hand to avoid creasing.
Best For: Detailed concealing work on all skin types.
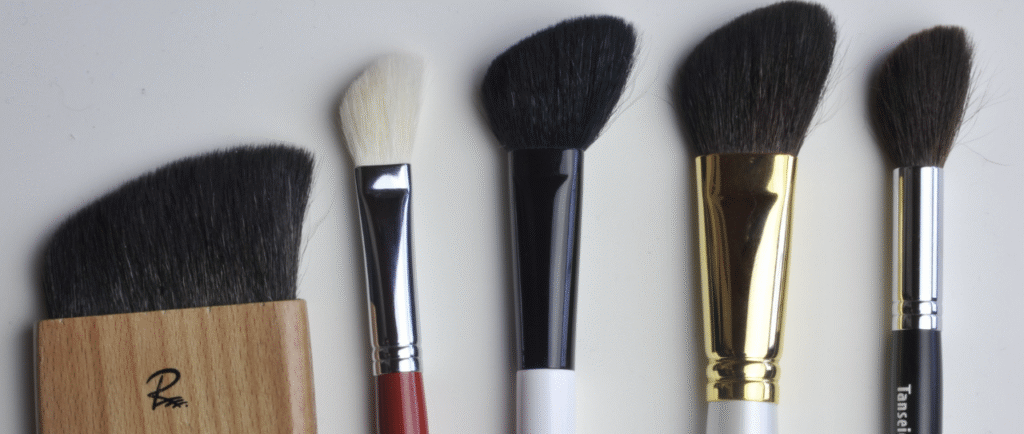
4. Powder Brush
This fluffy giant is a staple in any kit. A powder brush is used to set your makeup with loose or pressed powders, giving you that smooth, matte finish.
Use:
- Ideal for setting foundation with translucent powder
- Works for applying bronzer to large areas
- Soft bristles offer even distribution
Pro Tip: Swirl the brush in powder, tap off the excess, then lightly sweep it over your face. Avoid pressing too hard, which can disturb your foundation.
Best For: Oily and combination skin types that need extra setting.
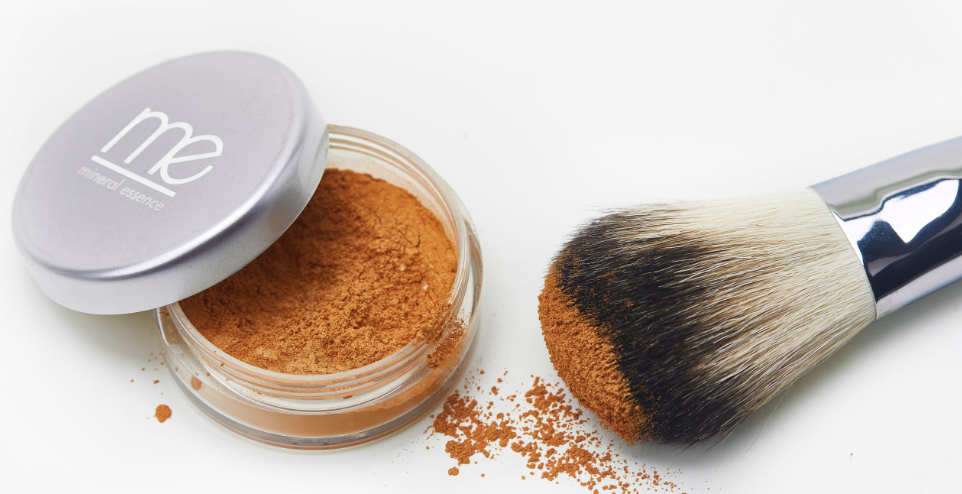
5. Kabuki Brush
Compact but powerful, the kabuki brush is perfect for blending powders—especially mineral foundations. Its short handle and dense bristles make it super travel-friendly.
Use:
- Excellent for buffing powder foundation
- Provides buildable coverage
- Can be used for bronzer or finishing powders too
Pro Tip: Use circular motions to buff powder into the skin. This not only blends the makeup but also helps minimize the look of pores.
Best For: Anyone who prefers powder over liquid foundations.
Sculpt & Glow: Contour and Highlight Tools
If the base is your canvas, contouring and highlighting are your paint strokes. These tools add definition, warmth, and light to your face—think of them as the chisels and brushes in your makeup art kit.
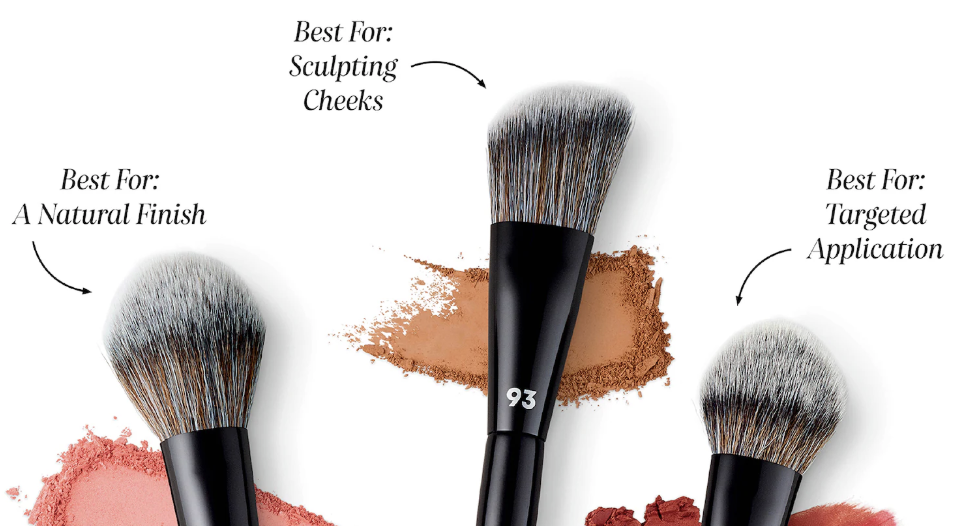
6. Contour Brush
A contour brush is specially shaped to fit the natural angles of your face. It’s often angled or slightly tapered, making it easier to define the cheekbones, jawline, and nose.
Use:
- Applies bronzer or contour powder/cream precisely
- Ideal for sculpting cheekbones and slimming facial features
- Gives a more defined, chiseled look
Pro Tip: Use a matte bronzer or contour shade that’s 2–3 shades darker than your natural skin tone. Blend well to avoid harsh lines—no one wants muddy cheeks!
Best For: Those who love structured, photo-ready makeup looks.
7. Fan Brush
Light as a feather, a fan brush is designed for soft applications—perfect for highlighter, sweeping away fallout, or applying a light dusting of shimmer.
Use:
- Light application of highlighter
- Cleans off excess powder or eyeshadow fallout
- Can be used for soft contouring on the nose or under cheekbones
Pro Tip: Gently sweep across the tops of your cheekbones, down the bridge of your nose, and on your cupid’s bow for a glowing finish.
Best For: All skin types—especially if you’re just starting to highlight and want a subtle look.
8. Stippling Brush
A stippling brush features two layers of bristles—dense at the bottom and lighter at the tips. This design allows it to “stipple” or dot makeup onto the face, creating a soft-focus, airbrushed effect.
Use:
- Applies foundation, cream blush, or tinted moisturizer
- Ideal for layering without caking
- Great for blending cream products
Pro Tip: Use light, bouncing motions for the best effect. It’s especially helpful when working with highly pigmented products—you’ll get the color without the heavy texture.
Best For: Sensitive or acne-prone skin, since it gives coverage without dragging the skin.
9. Highlighter Brush
While you can use your fan brush for highlighter, a dedicated highlighter brush—usually a small, tapered brush—gives more precision and control.
Use:
- Applies powder or cream highlighters to the high points of the face
- Gives an illuminated, healthy glow
- Can also be used for setting under-eye powder
Pro Tip: Use the brush dry for a soft glow or dampen it slightly for a blinding highlight. Apply in a “C” shape from the brow bone to the cheekbone for a lifted effect.
Best For: Anyone who wants to glow like a goddess—works on all skin types.
10. Blush Brush
Round, fluffy, and slightly domed, the blush brush is your best friend for adding that natural flush of color. The right one blends powder blush seamlessly without picking up too much pigment.
Use:
- Applies blush to the apples of the cheeks
- Blends product for a smooth, natural look
- Can double as a bronzer brush
Pro Tip: Smile while applying blush to find the apples of your cheeks, then blend upward toward the temples to lift your face.
Best For: All skin types, particularly those using powder products.
Eye Magic: Eye Makeup Tools You Need
Eyes are the focal point of most makeup looks. From smokey eyes to subtle neutrals, the right tools make all the difference in achieving clean lines, seamless blending, and striking detail.
11. Eyeshadow Brush
A basic eyeshadow brush is flat and dense, perfect for packing pigment onto your lids. This is your go-to tool for laying down a strong color base.
Use:
- Applies powder or cream eyeshadow evenly
- Great for packing color on the lid
- Can be used to apply glitter or shimmer
Pro Tip: Pat, don’t swipe. Patting deposits more color and prevents fallout, especially when working with bold or shimmer shades.
Best For: All eye shapes and makeup styles. If you’re just starting, this is your must-have brush.
12. Blending Brush
Blending is the key to any great eyeshadow look, and a blending brush is your secret weapon. It’s fluffy and tapered to help diffuse colors and blend out harsh edges.
Use:
- Softens and blends eyeshadow for a gradient look
- Helps with transition shades in the crease
- Essential for smokey eyes and natural looks
Pro Tip: Use windshield wiper motions in the crease for smooth blending. For added depth, layer multiple transition shades.
Best For: All eye types, especially hooded eyes that need subtle blending in the crease.
13. Eyeliner Brush
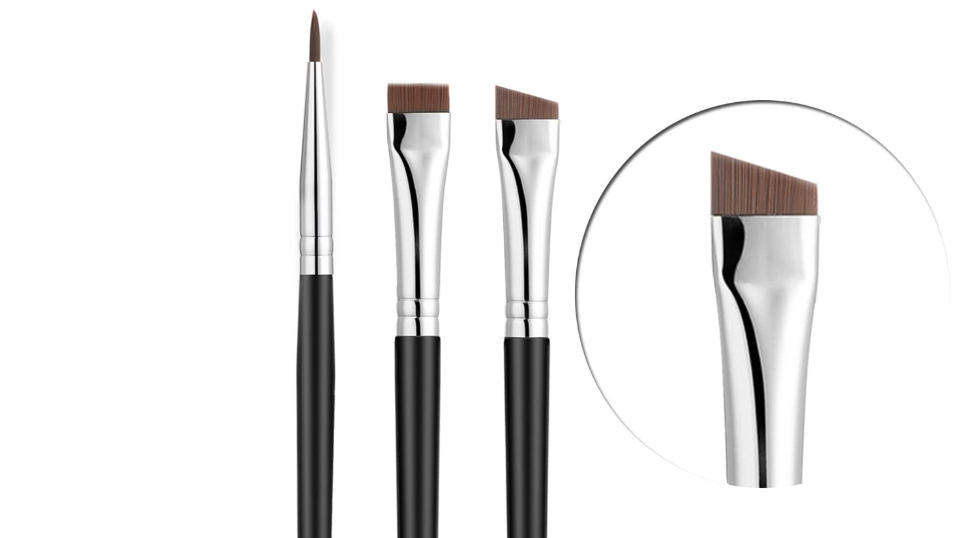
An eyeliner brush is thin, angled, or pointed—depending on the style—to help you apply gel or cream liners with precision. It’s a game-changer for sharp wings and tight-lining.
Use:
- Applies gel, cream, or powder eyeliner
- Creates precise lines or smudged effects
- Great for winged eyeliner looks
Pro Tip: Dip the brush in product, then press along the lash line in short strokes for a steady line. Clean after every use to maintain tip precision.
Best For: Anyone wanting to master the wing or experiment with creative liner looks.
14. Spoolie Brush
A spoolie looks like a mascara wand but is used to groom brows and separate lashes. It’s a simple tool that delivers major results in refining your eye area.
Use:
- Brushes brow hairs into place
- Blends eyebrow pencil or powder for a natural finish
- Separates lashes post-mascara
Pro Tip: Use the spoolie before and after applying brow product for a polished look. You can also spray it with hairspray to set unruly brows in place.
Best For: Everyone! Whether you do full glam or no-makeup makeup, neat brows make a difference.
15. Eyebrow Brush (Angled)
This brush is stiff and angled, ideal for filling in brows with powder or pomade. It mimics hair-like strokes for a fuller, more defined brow.
Use:
- Fills in sparse areas with brow powder or gel
- Defines and shapes brows
- Can also be used for soft eyeliner looks
Pro Tip: Use short, upward strokes in the direction of hair growth. Start from the middle and move toward the tail before lightly filling the front.
Best For: Anyone who wants structured, professional-looking brows.
Precision & Perfection: Detail-Oriented Tools
These small yet mighty tools fine-tune your look, allowing you to correct, shape, and enhance features with incredible accuracy.
16. Lip Brush
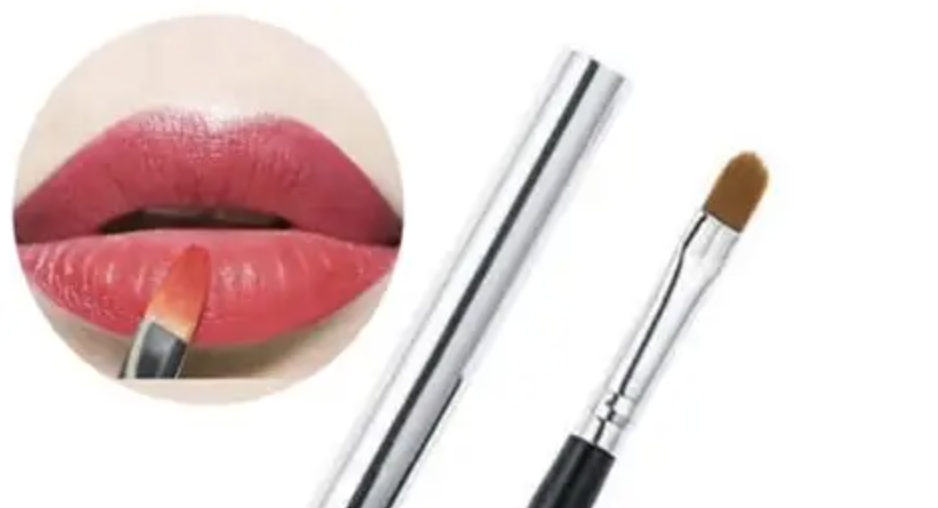
A lip brush allows you to apply lipstick or gloss with precision—especially useful when working with bold or dark colors. It ensures clean edges and better color payoff.
Use:
- Outlines and fills lips evenly
- Helps blend lip liner with lipstick
- Prevents product waste
Pro Tip: Load up your brush, then outline your lips before filling them in. This prevents feathering and gives a crisp, defined finish.
Best For: Makeup lovers who wear bold or matte lipsticks and want a refined finish.
17. Smudger Brush
A smudger brush is a short, dense brush that helps you create smokey eyes or diffuse eyeliner. It’s ideal for creating that sultry, lived-in look.
Use:
- Smudges eyeliner for a smokey effect
- Applies eyeshadow to the lower lash line
- Can soften harsh lines
Pro Tip: Use a smudger to apply dark shadow close to your lash line, then blend for an intense yet soft finish.
Best For: Those who love edgy, dramatic eye looks or want a diffused liner effect.
18. Brow Razor
Eyebrow razors offer a quick way to shape brows without plucking. They’re also used for dermaplaning (removing peach fuzz), making the skin smoother for makeup application.
Use:
- Shapes brows cleanly and painlessly
- Removes fine facial hair
- Preps skin for a smoother makeup base
Pro Tip: Always use on clean, dry skin. Pull the skin taut and glide the razor in short strokes downward for the best results.
Best For: Sensitive skin types that can’t tolerate waxing or tweezing.
19. Eyelash Curler
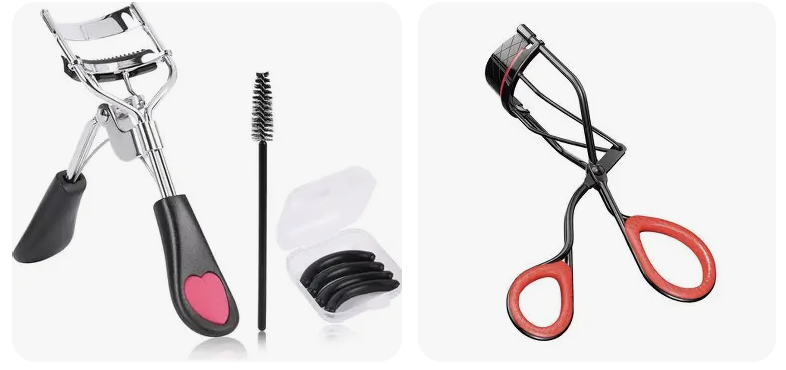
This tool lifts and curls your lashes, making your eyes appear bigger and more awake. It’s a must-have for anyone who wears mascara.
Use:
- Curls lashes before mascara
- Helps mascara hold better and last longer
- Opens up the eyes
Pro Tip: Use before applying mascara and hold for 5–10 seconds. For extra hold, gently heat the curler with a hair dryer for 3 seconds (test temperature before using).
Best For: Straight or downward-pointing lashes.
20. Tweezers
A classic beauty tool, tweezers are great for removing stray brow hairs, applying false lashes, or fixing makeup details.
Use:
- Plucks unwanted hair
- Applies false lashes precisely
- Removes splinters or fine debris from skin
Pro Tip: Use slanted tweezers for better control and precision. Always tweeze in the direction of hair growth to avoid breakage.
Best For: Brow shaping and detailed beauty tasks.
Maintenance & Hygiene Tools
Clean tools = clean skin. Dirty brushes can lead to clogged pores and breakouts, so keeping everything sanitized is essential.
21. Brush Cleaner
Brush cleaners come in liquids, sprays, or solid soaps to remove makeup residue, bacteria, and oil from your brushes.
Use:
- Cleans brushes for hygienic application
- Extends the life of your tools
- Removes product build-up
Pro Tip: Clean brushes weekly with a gentle cleanser. Rinse thoroughly and lay flat to dry.
Best For: Everyone—especially those with acne-prone or sensitive skin.
22. Makeup Organizer
A well-organized makeup kit saves time and keeps your tools in top shape. Organizers range from acrylic holders to fabric roll-up cases.
Use:
- Stores and protects makeup tools
- Keeps your station neat and tidy
- Reduces risk of contamination
Pro Tip: Separate clean and dirty brushes, and keep them upright in a holder to maintain their shape.
Best For: Makeup lovers with growing collections or traveling artists.
23. Cotton Pads & Q-Tips
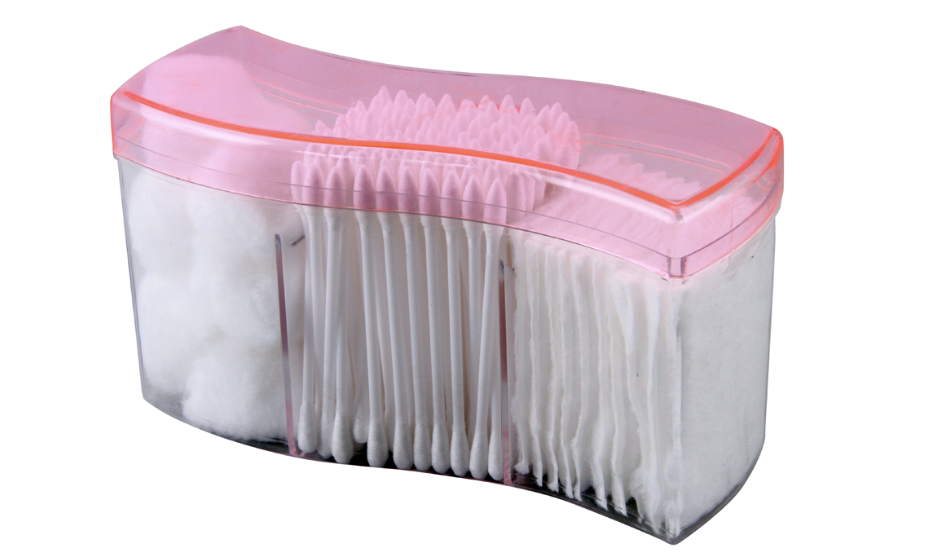
These humble tools are great for cleaning up mistakes, blending, and removing makeup.
Use:
- Fixes smudged eyeliner or lipstick
- Helps with micellar water application
- Ideal for touch-ups
Pro Tip: Keep them in a clean, sealed container to avoid dust and bacteria buildup.
Best For: Everyone—it’s the Swiss Army knife of beauty tools.
24. Disposable Applicators
Ideal for makeup artists or hygiene-conscious users, disposable wands and sponges prevent cross-contamination.
Use:
- Applies lip gloss, mascara, or foundation hygienically
- One-time use prevents bacteria transfer
- Great for sampling and client work
Pro Tip: Keep a few in your makeup bag for on-the-go touch-ups or hygienic use when sharing products.
Best For: Professionals or anyone who wants to avoid contamination.
25. Makeup Mirror with Light
A good mirror with LED lighting helps ensure your makeup looks great in all lighting conditions. It also makes detail work easier.
Use:
- Provides clear, even lighting
- Helps with precise application
- Magnified options available
Pro Tip: Choose a mirror with daylight LED lighting for the most accurate reflection of your makeup.
Best For: Daily use, especially in low-light spaces or for precision makeup.
Comparison Table: Must-Have Makeup Tools at a Glance
| Tool Name | Primary Use | Best For | Pro Tip |
|---|---|---|---|
| Foundation Brush | Applying liquid/cream foundation | Full coverage lovers | Use circular motions for even blending |
| Beauty Blender | Blending makeup seamlessly | All skin types | Use damp for best results |
| Blush Brush | Applying blush | All face shapes | Blend upward toward temples |
| Eyelash Curler | Curling lashes | Small/straight lashes | Warm it slightly for longer curl hold |
| Lip Brush | Precise lipstick application | Bold lip looks | Outline lips first for sharp definition |
Pro Tips: Choosing the Right Tools for Your Skin Type and Routine
- Oily Skin: Look for brushes with synthetic bristles and tools that don’t absorb oil. Stick with powders and powder-compatible tools.
- Dry Skin: Use beauty sponges and dense brushes that won’t flake or irritate the skin. Hydration is key.
- Sensitive Skin: Always keep tools clean, opt for soft bristles, and avoid rough razors or stiff sponges.
- Travel-Friendly Kits: Invest in multi-use tools like kabuki brushes and dual-ended options to save space.
Sourcing Quality Makeup Tools
Quality matters when it comes to makeup tools—not just for performance but also for skin health. One excellent way to find reliable suppliers is through sourcing agents.
Simoosourcing is a trusted sourcing agent in China that specializes in helping brands and individuals procure high-quality beauty and cosmetic tools at affordable prices.
Whether you’re a beauty startup or looking to create your own makeup line, Simoosourcing can connect you with verified manufacturers, handle logistics, and ensure quality control from start to finish.
You can visit their website for more info and to get a quote for your project. They help simplify the complex sourcing process and are known for reliability and transparency.
Final Thoughts: Building Your Ultimate Makeup Kit
So there you have it—25 essential makeup tools and their uses that can totally transform your beauty game. Whether you’re new to makeup or a seasoned artist, having the right tools not only enhances your makeup but also saves time and reduces product waste.
Read this review before you buy, take notes, and start building your dream kit. Don’t be afraid to experiment—but always invest in tools that work for you. With the right brushes and accessories, you’re already halfway to a flawless finish.
FAQs About Makeup Tools
1. What are the most important makeup tools for beginners?
Start with a foundation brush, beauty blender, blending eyeshadow brush, powder brush, and spoolie. These cover your basic face and eye needs.
2. How often should I clean my brushes?
Ideally, once a week for brushes used with creams or liquids. Powder brushes can be cleaned every 2 weeks. Use a brush cleaner or gentle shampoo.
3. Can I use fingers instead of makeup brushes?
Yes, but tools offer better precision, hygiene, and blending—especially for advanced techniques and full coverage looks.
4. Are expensive makeup tools worth it?
Not always. Some drugstore brands offer excellent quality. Focus on the material and design rather than the brand name.
5. How do I know if a tool is good quality?
Check for bristle softness, sturdy handles, and user reviews. Tools that shed or lose shape quickly are often low-quality.